Saildrive removal (SD50)
Printed From: myHanse.com
Category: Hints & Tips
Forum Name: 400
Forum Description: 400 Hints, Tips and News
URL: https://www.myhanse.com/forum_posts.asp?TID=15230
Printed Date: 27 March 2026 at 01:23
Software Version: Web Wiz Forums 12.06 - https://www.webwizforums.com
Topic: Saildrive removal (SD50)
Posted By: MartinR34
Subject: Saildrive removal (SD50)
Date Posted: 01 July 2025 at 21:58
|
Hi. Having been let down by Yanmar (no availablity of a part) and then my engineer (due to the delays), I am considering the removal and replacement of my corroded SD50 myself. Two questions for those who have removed their saildrive in the past if I may: 1. Do I need to entirely remove the engine (3JH5E) to access and remove the SD50 or just slide it forwards? 2. Is there sufficient room in the engine bay to lift and then tilt the saildrive backwards to clear the prop shaft through the hull opening or do I need to butcher any of the surrounding bulkheads? I'm replacing with an SD60 and have the adaptor plate. The part Yanmarr has let me down on is the damper plate between the engine and saildrive (part number is 177090-03500). Does anyone know where I might be able to find one quickly? I'm on the south coast of England. The boat is sat on hardstanding and I am keen to get in the water.
|
Replies:
Posted By: jeb
Date Posted: 02 July 2025 at 08:01
I did this during the winter when I replaced the diaphragm. I would recommend to remove the engine completely to have good access, the hardest part is the first 20-30cm where you need to lift (or slide) it with COG inside the engine room. I would recommend to remove the companionway and use a chain hoist and then put the engine on some type of cradle. I used a "C" shaped beam to be able to use the chain hoist the first 20-30cm. To get the sail drive out you need to remove the prop shaft OR separate upper from lower housing, no need to cut or remove any interior. First option is the easy way. You also want to secure the leg so it does not tilt and jam the pinion in the damper-plate. This is even more important when re-installing.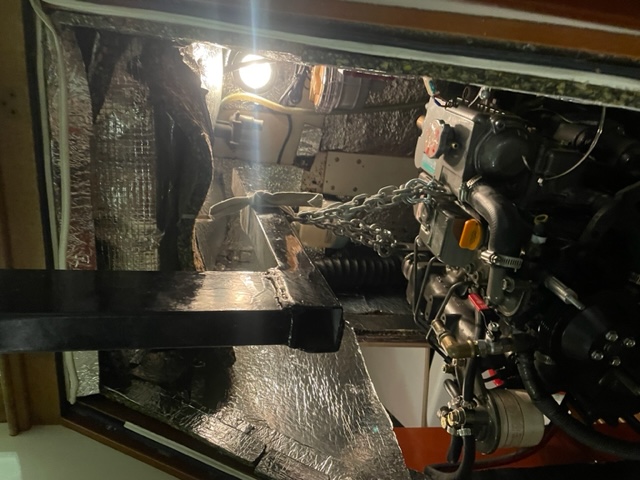 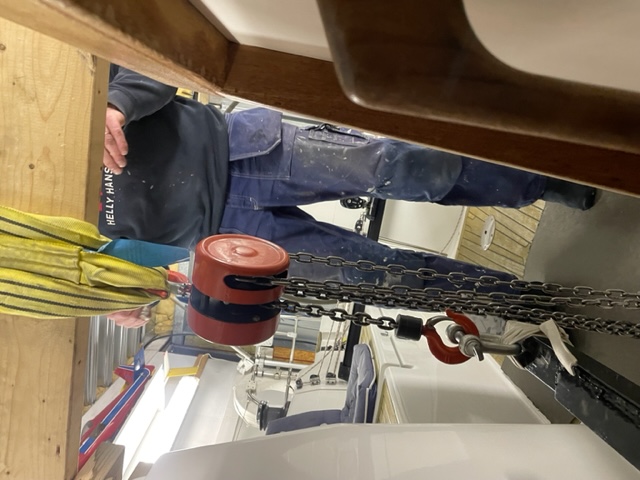 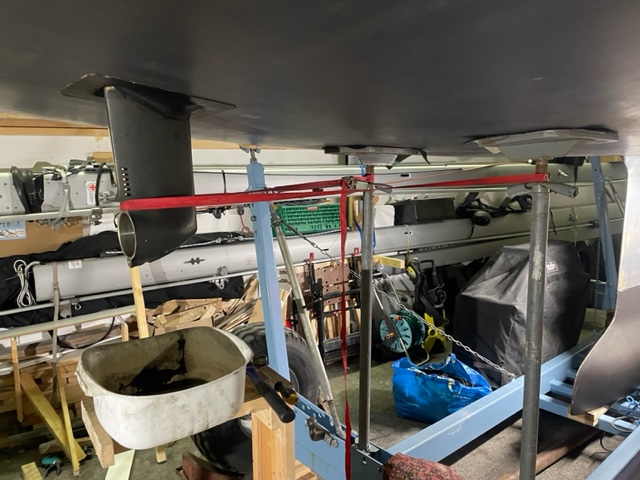 ------------- Jesper Hanse 400e |
Posted By: Ggerrit
Date Posted: 03 July 2025 at 15:36
|
Hi, During the covid period I also changed to a sd60. I just slide the motor on a temporaly fundationmade from concrete plate frontwards. And The demperplate is availe in the Netherlands... ------------- H400 2008 2 cabin |
Posted By: MartinR34
Date Posted: 03 July 2025 at 15:45
| Thanks. I'm hoping to do the job over the next couple of days. |
Posted By: MartinR34
Date Posted: 03 July 2025 at 15:46
| Thanks. I will do similar. I have now ordered the damper plate from the United States. Ridiculous that Yanmar UK cannot source one... |
Posted By: Arborist
Date Posted: 07 July 2025 at 20:18
|
Nice shed!!! ------------- hanse 400 2007 no 244 |
Posted By: MartinR34
Date Posted: 10 July 2025 at 12:35
Hi. Quick update. Engine is now removed. SD50 also removed. I couldn't pull the prop shaft as the parts were welded together through corrosion, so I split the leg from the gearbox. Diaphragms appear perfect despite reportedly being 15 years old  Now need to clean the engine bay and install the SD60. To remove the prop shaft for install presumably I simply drain the oil and then remove? 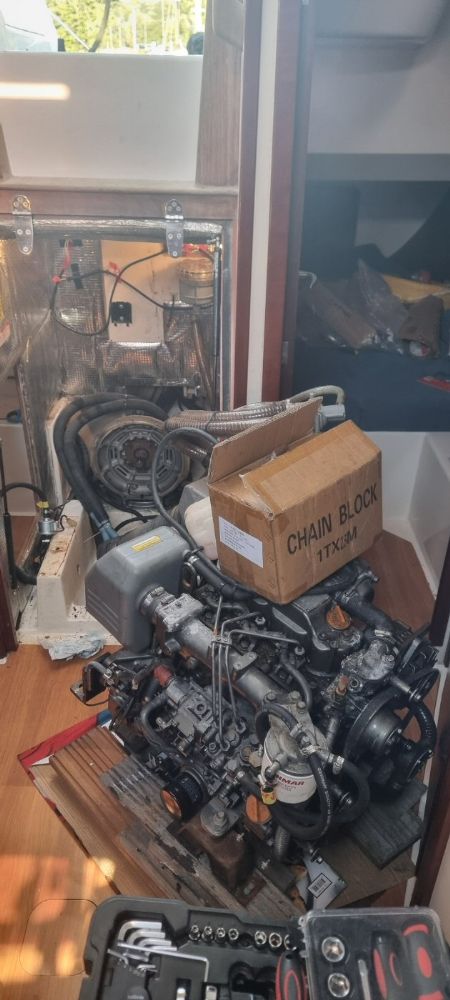 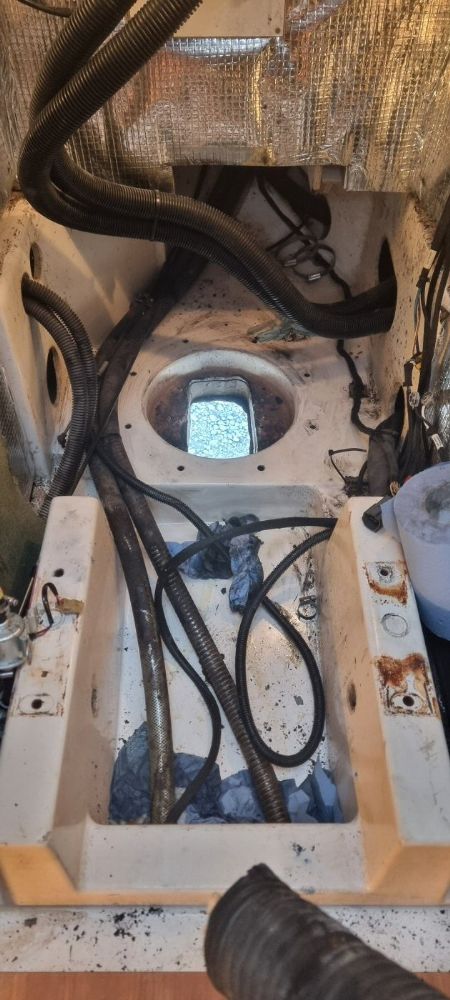 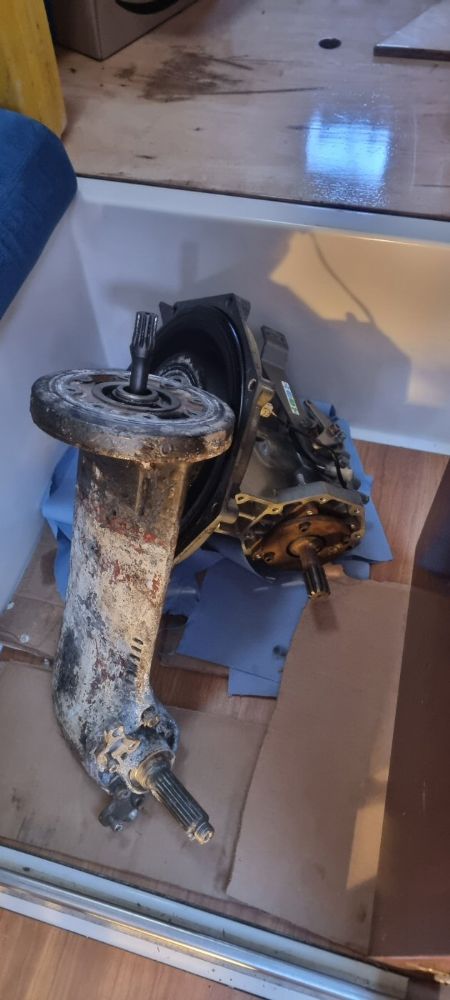 |
Posted By: jeb
Date Posted: 10 July 2025 at 12:49
|
That is correct regarding the removal of prop-shaft. May bee it is not filled with oil if the SD60 is brand new. When I removed my shaft I made a tool to apply even force on the cover. I used the 2 SS adapters that connects the 2 anode pieces to the leg. I removed the Anodes, the 2 SS adapters halves, took out the 2 bolts holding (M10?) the cover and then re-installed the adapters and threaded 2 long screws (M8 if I remember) that pushed to the bottom of the M10 holes in the leg. I could then remove it without any jamming by carefully screw in bot screws at the same time. Sorry, but I don't have any pictures, only the anode kit. The SS adapters marked in red. 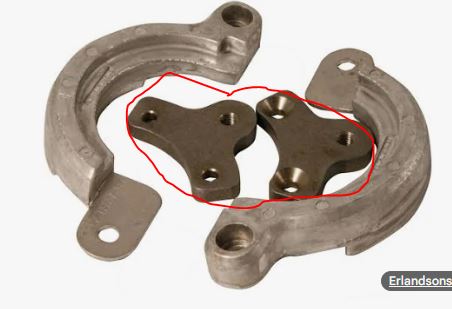 ------------- Jesper Hanse 400e |
Posted By: MartinR34
Date Posted: 10 July 2025 at 13:52
| Thanks Jeb. I think that the saildrive comes pre-filled as there is a sticker suggesting that the oil level be checked before running. I'll check. Thanks for the advice regarding the removal of the cover. |
Posted By: Ggerrit
Date Posted: 10 July 2025 at 15:43
|
Hi, You don't have to remove the propshaft....Mine fits through the existing hole. not easy but it did. ------------- H400 2008 2 cabin |
Posted By: MartinR34
Date Posted: 12 July 2025 at 12:42
| Interesting. Did you put it in from the front and simply tilt it down and through? Ideally this would be done from the aft end but there appears to be insufficient room / height with the mounting plate. |
Posted By: MartinR34
Date Posted: 20 July 2025 at 12:37
|
Final update. New saildrive installed with longer securing bolts to offset the depth of the adapter plate. Also used longer bolts for the engine mounts for the same reason. Engine back in after many wasted hours trying to align shaft and coupler without being able to see it other than with a small camera inserted through the gap between the bellhousings. Finally bit the bullet and cut out most of the engine bay bulkhead in the starboard aft cabin. Could then see everything and properly access the space for correct positioning of the wedges etc to lift and align engine properly. Inserted and pushed together inside 30 minutes. Why Hanse didn't cut proper access panels is beyond me. Top tip: if you haven't already done so, cut much bigger access panels to do this job. I would have saved 6-7 hours of engine back and fro and adjustment with no success had I done this at the beginning. I used the top tip from Jeb to remove the prop shaft housing from the saildrive - thanks  . .Boat launch scheduled for Tuesday 🤞 ------------- Sapphire. 2010 400 #687 |