


|
| |
| Welcome to myHanse.com the forum for Hanse Yachts owners throughout the world. | |
My updates on Hanse 400 2012 |
Post Reply 
|
Page <1234> |
| Author | |
Rikard_Swe 
Lieutenant Commander 

Joined: 05 August 2019 Location: Stockholm Status: Offline Points: 69 |
 Post Options Post Options
") Thanks(0) Thanks(0)
 Quote Reply Quote Reply
 Posted: 02 June 2020 at 07:19 Posted: 02 June 2020 at 07:19 |
I bought second hand winston cells. 8 pcs 180 Ah cells that I combined to two batteries that are in paralell. 1S4 x2 configuration. Some say that you should build them in a 2S4 configuration so you end up with one battery. This seems to work. One thing that I have noticed is that when I dont reach full charge the start battery does not get full charge aswell. So last sunday when we were going home the start battery (also for the aft windlass) was completely out of power. I could start the engine but not roll up the windlass. I know that I need to change my start battery, it is 8 years and the former owner neglected most of the boat. But I will probably change so the windlass uses the domestic battery instead of starting battery. Overall Im very happy with litium solution.
|
|
 |
|
|
Rikard_Swe
Lieutenant Commander
Joined: 05 August 2019 Location: Stockholm Status: Offline Points: 69 |
Post Options
Thanks(0)
Quote Reply
Posted: 02 June 2020 at 08:20 |
|
The work with the watermaker pregress in almost slowmotion. Gathering all parts and making place for everything is a big job.
If we would have had a 2 cabin layout this would have been a non problem. In the space infront of the kitchensink there is a trough hull for seawater in - to the kitchen. This will be used for seawater in to the watermaker. The water shall pass two filters before going into the watermaker. Then the product will go trouh two filter, one mineral and one carbonfilter then to the watertank. The filterhousing are quite big. I topmounted them to make minimal impact on the interior. I might figure saw out abit more. I just had a handsaw when sawing them in the archipelago last weekend. 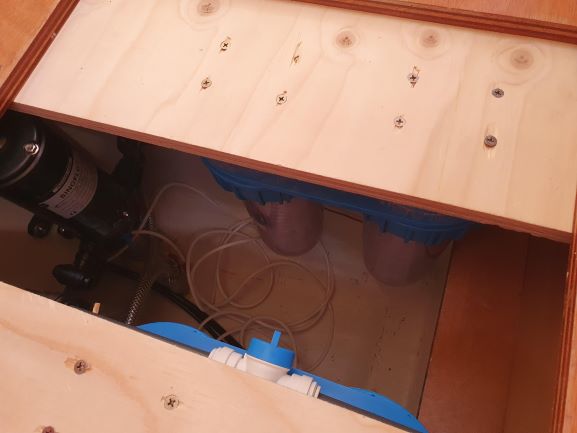 Here is the prefilters. 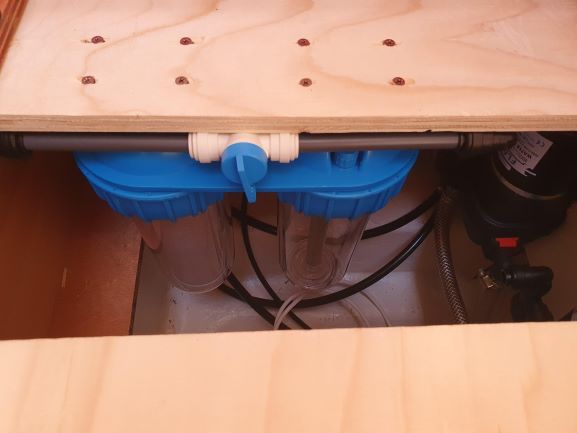 This is the after filter. The Valve is to have some of the water going passed the filters to make the water taste something. If all water goes trough the filters the water becomes tasteless. |
|
|
|
|
Ggerrit
Captain 
Joined: 19 June 2016 Location: Monnickendam Status: Offline Points: 163 |
Post Options
Thanks(0)
Quote Reply
Posted: 02 June 2020 at 14:26 |
|
Hi,
What Brand and type of watermaker are you going to use ? And is that going to fit in the space under the sink ? Gerard
|
|
|
H400 2008 2 cabin
|
|
|
|
|
Rikard_Swe
Lieutenant Commander
Joined: 05 August 2019 Location: Stockholm Status: Offline Points: 69 |
Post Options
Thanks(0)
Quote Reply
Posted: 02 June 2020 at 19:55 |
|
The watermaker will be placed under the satee/couch, i got a bit worried if i measured right - so it fits. I hope so :D
I have a Swedish made Watermaker Afflux Baltic. Produces 50 L/hour. Today I was down by the boat to continue the work. My inverter is just on the edge of coaping the work. And my stock charger (Sterling) doe not like my new batteries. So what to do? I change them both to a Victron charger/inverter. I have alot of Victron parts - they are reliable and very easy to work with. So I started to take the old inverter out and cleaned up by the batterybank - that felt good. After I installed the solarpanel and controller I will make the last adjustments, but for now it is better. 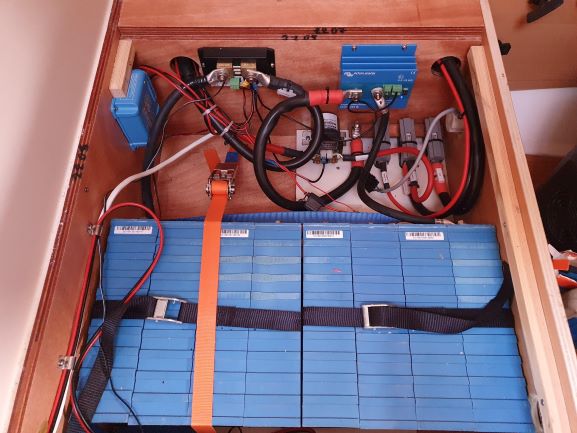 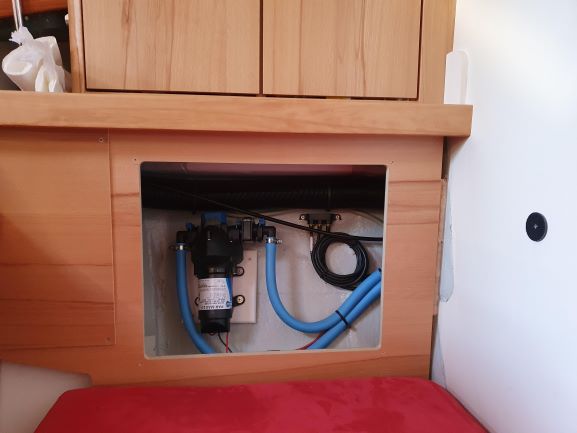 The waterpipe goes troug to the fron port closter where the inlet of fresh water is. I have an idea to puch the small 8 mm pipe into the big inlet hose. So I dont need to make a new hole in the tank. 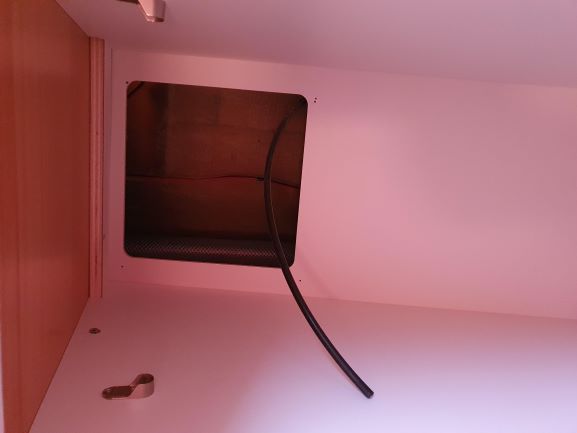 Here it comes out from the closet :)
|
|
|
|
|
Captain Cook
Admiral 

Joined: 23 May 2006 Location: Denmark Status: Offline Points: 1245 |
Post Options
Thanks(0)
Quote Reply
Posted: 03 June 2020 at 00:00 |
|
Consider the place you draw the seawater for the watermaker. Do not place it too close to the kitchen/toilet waste outlet. I have placed mine beside the depht sounder in the front.
|
|
|
Freya H400 #27 (2006),2-cabin, 40HP 3JH4E, 3-blade Flexofold, Aries LiftUp Windvane, Exturn 300, Jefa DD1,Simrad NX40,Icom M603(VHF)+M802(SSB)
|
|
|
|
|
Rikard_Swe
Lieutenant Commander
Joined: 05 August 2019 Location: Stockholm Status: Offline Points: 69 |
Post Options
Thanks(0)
Quote Reply
Posted: 03 June 2020 at 05:18 |
I have aprox 2 meters between the seawater in and seawater out. I take seawater in under the sink in the kitchen. Brine out will go trough hull in the toilet. I had an idea to have the brine in the aft of the boat, but the installation of pipes became very complicated. When they buld these types of boats they put down all electrics and pipes befoe mounting the innerliner - effective mounting solution, but that makes after mounting equipment very complicated and time cinsuming. :)
|
|
|
|
|
jeb
Captain
Joined: 05 May 2014 Location: Sweden Status: Offline Points: 339 |
Post Options
Thanks(0)
Quote Reply
Posted: 03 June 2020 at 09:57 |
|
Nice job!
What type of BMS are you using? I saw that you have the BP230 but that will only take undervoltage on the whole pack. I also think you should consider turning your batteries to have the terminals pointing up. I just installed 400 Ah Winston in my h400. I made a slot in the bottom of the original battery compartment and built a new box for my 4 cells.
|
|
|
Jesper
Hanse 400e |
|
|
|
|
Rikard_Swe
Lieutenant Commander
Joined: 05 August 2019 Location: Stockholm Status: Offline Points: 69 |
Post Options
Thanks(0)
Quote Reply
Posted: 03 June 2020 at 10:58 |
Thanks, good idea! I will check that - after I finished my WM installation :) bad idea to tear the whole boat apart weeks before the vacation :) |
|
|
|
|
Rikard_Swe
Lieutenant Commander
Joined: 05 August 2019 Location: Stockholm Status: Offline Points: 69 |
Post Options
Thanks(0)
Quote Reply
Posted: 04 June 2020 at 20:27 |
|
Today I got some hours to work on the watermaker. My thaught is to have it down here. 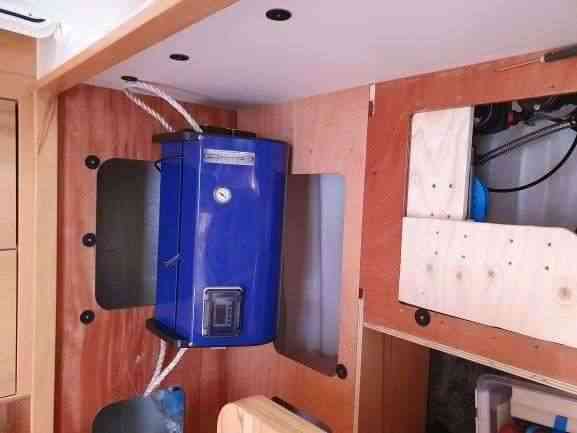
Im thinking it might be better to have it behind the backrest - but I dont think the space is enough. 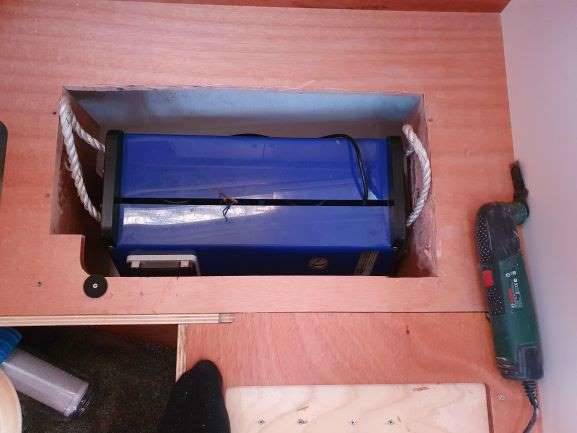 3-4 cm of free space. Perhaps I will open a hole so I can see the display (if needed). Some more fittings then I think I have all I need.
|
|
|
|
|
Rikard_Swe
Lieutenant Commander
Joined: 05 August 2019 Location: Stockholm Status: Offline Points: 69 |
Post Options
Thanks(0)
Quote Reply
Posted: 07 June 2020 at 18:53 |
|
I want to have all controls on one place. The watermaker runs on 220V, inverter will be on, but perhaps we will run the inverter with other things - then I dont want the watermaker to draw power. So I needed 220 Volt on/off. 12 V on/off for the raw water pump and the start/stop for the watermaker. They way I figured to have all the switches look the same was to use 220V breakers. 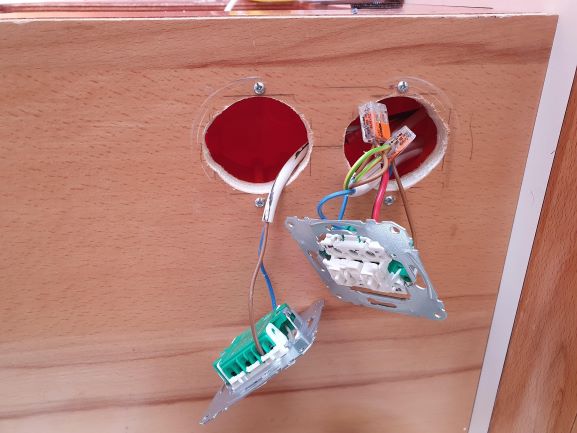 Since I will have 220V and water in the same compartment - I put a cover over the back of the switches. 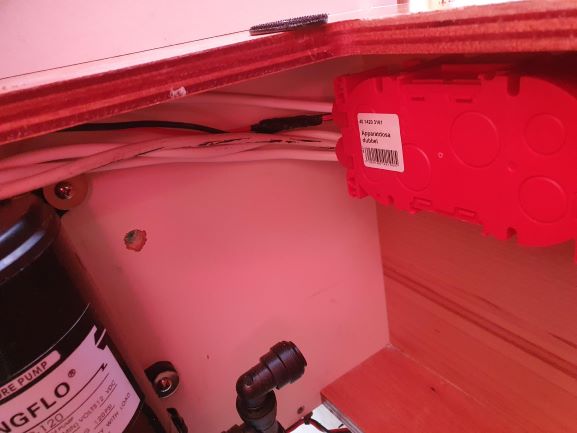
When the cover is on and the cusions is where they shall be it looks quite ok. 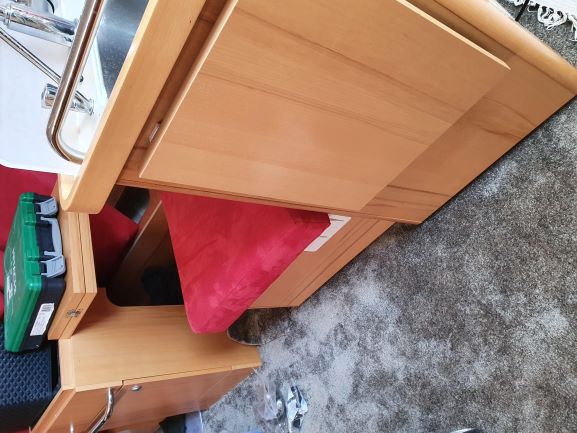 A new trough hull for the brine.  Watermaker on its place, the pipes goues trugh the wall so they stay at the same place. 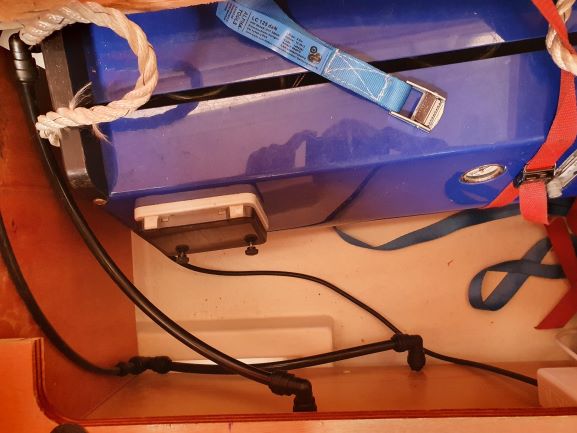 Filter tool set on its new place.  Im missing 2 screw connectors and one connector then I can start the watermaker and see if it runs.. :) |
|
|
|
|
Post Reply
|
Page <1234> |
| Tweet |
| Forum Jump | Forum Permissions You cannot post new topics in this forum You cannot reply to topics in this forum You cannot delete your posts in this forum You cannot edit your posts in this forum You cannot create polls in this forum You cannot vote in polls in this forum |
|
Links : www.hanseyachts.co.uk www.hanseyachts.com www.fjordboats.co.uk www.dehler.co.uk www.varianta.co.uk |


 Topic Options
 spam wrote: